Showing posts with label quilted potholders. Show all posts

Sunday, March 18, 2012

Quilted Potholders: Quarter Squares

The last technique to try is Quarter Squares. Two methods are shown in this post.

Hourglass Potholder
I used Stampin' Up! Timeless Portrait fabric.
Cut an 8 in. square from two fabrics.
With right sides together, cut diagonally through both layers.
Sew a short side of the resulting triangles using a scant 1/4 in. seam.
Open the triangles and press seams toward the dark fabric.
With right sides together sew the triangles together to form the block. Press the seam open and trim the edges. The block should measure 10 in. Layer the block over batting and backing fabric.
Pin and sew through all layers to quilt. I started with a 2 in. square in the centre, then continued sewing squares 1 in. from the previous stitching.
Cut (3) 2-1/2 in. X 18 in. strips from third fabric for binding and refer to the instructions for binding edges from Log Cabin Potholder.


 Ohio Star Potholder
The hourglass squares in this method are sewn differently. You will get two finished quarter squares from each pair of 3-1/4 in. squares.
I used Stampin' Up! Spice Cake fabric.


Cut (2) 3-1/4 in. squares from two fabrics.
Layer a light square on a dark square with right sides together.
Mark from corner to corner with a vanishing ink pen, or lightly with a pencil.
Sew a  scant 1/4 in. from both sides of the line and cut on the line.
Press the seams to the dark fabric. You will have two half squares.
Layer the half squares with right sides together and alternating dark and light fabrics.
Mark from corner to corner across the seam with a vanishing ink pen, or lightly with a pencil.
Sew a  scant 1/4 in. from both sides of the line and cut on the line.
Press the seams open.
You will have two quarter squares.
Repeat with the other pair of 3-1/4 in. squares to make four quarter squares.

Trim the edges to measure 2-1/2 in. square.
Cut (5) 2-1/2 in. squares from medium fabric for the corners and centre of the block.
Cut (2) 2-1/2 in. X 18 in. strips from light fabric.
Sub-cut (4) 2-1/2 in. X 6-1/2 in. strips and (4) 2-1/2 in. squares.
Layout pieces as shown.
Sew squares to hourglass squares to form three middle sections and press seams away from hourglass squares.
Sew these strips together to form middle block and press seams away from middle section.
Sew side strips to middle block and press seams toward strips.
Sew corner squares to sides of top and bottom strips and press seams toward strips.
Sew top and bottom sections to middle section to complete block.
Layer over batting and backing fabric. Pin and sew through all layers 1/4 in. outside star, and centre squares. Sew square, en pointe, from middle of sides and sew an X on corner squares.
Cut (3) 2-1/2 in. X 18 in. strips of binding fabric and refer to Log Cabin Potholder instructions to bind edges.

Sunday, March 4, 2012

Quilted Potholders: Half Squares

The next skill to try with strips or squares for piecing quilts is half squares for more design options.

Rosebud Block
This block is a variation of the Bear's Paw block.

I used Stampin' Up! Twitterpated fabric. 125412


From Stampin' Up! Twitterpated fabric cut:
Pink print: (3) 2-1/2 in. X 18 in. strips and sub-cut (1) 2-1/2 in. square
Floral print: (1) 2-1/2 in. X 18 in. strip and sub-cut (1) 4-1/2 in. strip and (1) 6-1/2 in. strip
Stripe: (1) 2-1/2 in. X 18 in. strip and sub-cut (1) 6-1/2 in. strip and (1) 8-1/2 in. strip


From background fabric cut (1) 2-1/2 in. X 40 in. strips and sub-cut:
(5) 2-1/2 in squares
(1) 4-1/2 in. strip
(1) 8-1/2 in. strip
(1) 10-1/2 in. strip


Place a background square on the ends of the print fabric strips and mark a diagonal line lightly with pencil.


Copy the direction of the diagonals in this photo and sew on the pencil lines.
Trim 1-4 in. from the stitching and press the background triangle over the seam allowance.


Use a scant 1/4 in. seam allowance and sew a background square to the pink print square and press the seam toward the print fabric.
Sew 4-1/2 in. background strip to the unit and press seam toward background.


Sew 4-1/2 in. floral print strip with background triangle to the unit.
Sew the next floral print strip with background triangle to the unit.


Continue sewing strips to unit and pressing seams as you go.

Trim the edges and layer over batting and backing fabric. Quilt through all layers 1/4 in. inside and outside printed fabric shapes. I used pink thread.

Sew pink print strips together to make binding and refer to Log Cabin Potholder tutorial for binding edges.


Open Rose Block
Another half square block. I used Deck the Halls Stampin' Up! fabric. 121716


Red print: cut (2) 2-1/2 X 18 in. strips and sub-cut into (12) 2-1/2 in. squares
Green print: cut (3) 2-1/2 in. X 18 in. strips and sub-cut into (16) 2-1/2 in. squares
Tan print: cut (3) 2-1/2 in. X 18 in. strips and sub-cut into (2) 2-1/2 in. squares and (1) 2-1/2 X 6-1/2 in. strip
Pair up 8 sets of green print and red print squares. Mark a diagonal line and sew on the line.


Cut off one triangle leaving a 1/4 in. seam allowance.


Press seam toward green fabric.


Lay out squares and strip.


Use a scant 1/4 in. seam allowance.
Sew squares together to form sections.
Sew sections together to form block.
Trim edges and layer block over batting and backing fabric. Quilt through all layers following photo. I used red thread.
Sew tan print strips together to make binding and refer to Log Cabin Block tutorial to finish edges.

Tuesday, February 28, 2012

Quilted Potholders: Strip Piecing

I know, I know! This is a stamping blog. But, since Stampin' Up! introduced Designer Fabric I've been learning to quilt and I want to share. I hope you'll give my simple potholder tutorials a try.

The first two projects are strip-pieced. It's so easy!

Log Cabin Block
I used Flirtatious 122335 and Springtime Vintage 121817 fabrics.
Cut 2-1/2 in. wide strips and sub-cut them into these lengths:
Springtime Vintage large floral (1) 2-1/2 in. square
Flirtatious pink doilies (1) 2-1/2 in. square and (1) 4-1/2 in. strip
Flirtatious lavender doilies (1) 4-1/2 in. strip and (1) 6-1/2 in. strip
Springtime Vintage small floral (1) 6-1/2 in. strip (1) 8-1/2 in. strip
Springtime Vintage blue print (1) 8-1/2 in. strip (1) 10-1/2 in. strip


All seam allowances are a scant 1/4 in. unless otherwise stated. Sew the squares together and press the seam toward the doily fabric.
Sew the next strip to the first section and press the seam toward the new strip.
Sew the next strip and press the seam toward the new strip.
Continue sewing and pressing the strips.
Trim the edges of the finished block.
Layer the pieced block over batting and backing fabric. Pin and sew through all layers. I stitched 1/4 in. inside and outside the squares with pink thread.

Add a heat resistant fabric layer to the bottom if desired and trim the edges.
Cut (3) 2-1/2 in. X 18 in. strips. Sew the strips into a continuous strip and press the seams open. Press in half lengthwise.
Match  raw edges of binding strip and quilted potholder. Start sewing 3/8 in. from the edge and about 4 in. from the end of the binding strip.
Stop 3/8 in. from the corner with needle down.
Lift presser foot, pivot fabric and lower presser foot.
Sew off the edge.

Fold binding strip over edge.


Fold binding strip down to turn corner.


Sew from edge to next corner and repeat steps for all corners.


After last corner overlap ends of binding strip and trim. Finger press 3/8 in. on end of strip.
Join binding strip and finish seam.
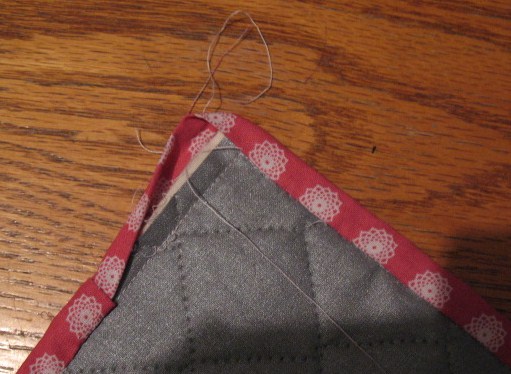
Hand sew binding to back of potholder. Form corners as shown.


Continue sewing binding. Add a hanger loop and a button if desired.


Nine Patch Block
I used Beau Chateau fabric 122336.

 Cut (3) 2-1/2 in. X 18 in. strips each from two fabrics.
Sew two sets of 3 strips with a scant 1/4 in. seam allowance alternating fabrics. (One light strip between two dark strips and one dark strip between two light strips.)
Press seams toward blue strips. Use a rotary cutter and straight edge to cut the sets into 2-1/2 in. sections. You should have 14 sets

 Sew Nine Patch block from sections. Press seams toward sides.
Sew remaining sections into alternating fabric binding strip. Press seams open and press strip in half lengthwise.


Trim edges.
Cut (2) 2-1/2 in. X 18 in. strips from rooster fabric.
Sub-cut each strip into a 6-1/2 in. strip and a 10-1/2 in. strip.
Sew short strips to sides of block and press seams toward strips.
Sew long strips to top and bottom and press seams toward strips.
Layer with batting and backing fabric and sew through all layers diagonally with white thread. Add a heat resistant fabric layer to the bottom if desired and trim the edges.
Sew binding to edges following instructions for first potholder.