What is Paper Pumkin? It's like your fairy god-mother helping you to escape the dreary bits of life. Make that a paper-crafting fairy god-mother sending you a surprise kit every month, allowing you a creativity escape.
Want to get started? Click on the Paper Pumpkin link in my left side-bar and subscribe. It costs $24.95 per month, including shipping.
I wasn't sure if I wanted to subscribe, so I ordered the Try It Kit to see what it was all about.
 The Try It Kit contains everything you need to make 2 very cute little journals.
Mount the stamp.
 The first thing you need to do when you open your kit is assemble the clear-mount rubber stamp.
 -peel off the backing from the foam layer on the rubber stamp
 -peel the label from the sheet leaving the backing
 -the backing on the label is cut into two
-peel away half of the backing
 -adhere the exposed sticky side of the label to the foam layer on the rubber stamp
 -peel away the rest of the back from the label

-press the label firmly onto the foam layer of the rubber stamp
 I decided to tie the Baker's twine around the pages to make 2 string bookmarks in my journals.
Each bookmark has 2 butterfly card stock stickers adhered back to back on the string.
 My butterflies have Baker's twine bodies and antennae.
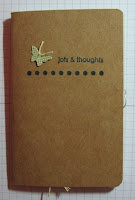 Because I used 8 butterfly stickers for the bookmarks and 3 on the front of my first journal, I only had 1 left for the second journal. So, I changed the cover layout.
At this point, I decided to subscribe to Paper Pumpkin and see what was in the Welcome Kit!
Welcome Kit
 I liked the supplies in the kit, but I was disappointed that the project was 4 cards of the same design.
No matter! I came up with 4 more designs. The Baker's twine is from my Try It Kit, but you could use anything at hand.
My Designs
 Design #1
-the piercing can be done with a pin or left out
-after inking the splatter stamp, stamp on scrap paper, then on the mat to lighten the intensity

-cut 1 in. from the bottom of the mat and save it
-cut 2 X 3/8 in. strips from the side of the mat
-turn the strips over and adhere them under the sides of the mat

Design #2
-use 2 of the scallop stickers and trim them to fit on the mat
-cut the over-printed striped strip from the sticker sheet and adhere it over the scallop edge
-adhere the mat to the card front and stamp the sentiment
-tie a string bow in the button and adhere it to the card

Design #3
-cut the over-printed green strip from the sticker sheet and adhere it to the card front
-cut a leaf from a scallop sticker and adhere it to the card front
-cut 2 circles from the mat and adhere the larger circle, dot side up, to the card
-snip around the edge of the smaller circle, curl the petals upward, white side up and adhere it to the larger circle
 -stamp the splatter image on a seal sticker
-adhere it to the flower on the card front
-tie a string bow in a button and adhere it to the flower
-stamp the sentiment
 Design #4
-use a scrap from the flower card to cut a pennant
-ink "friend" on the sentiment and stamp it on the pennant
-fold the edge of the pennant over a length of string
 -use the edge of the clear block to score across a seal sticker
 -position the string over the score line
 -fold the seal over the string
-thread a button on the string
 -score across a striped ribbon sticker and adhere to the string as for the seal sticker
-adhere the banner of pennants to the white side of the mat
-adhere the ends of the string to the back
-adhere the mat to the card front
-stamp the sentiment (I used the Ink Spot from my Try It Kit)
 Use the remaining sticker seals and ribbons to decorate the envelopes!
Go ahead! Subscribe to Paper Pumpkin and make it your own. I'll be sharing My Paper Pumpkin here each month.
I wasn't sure if I wanted to subscribe, so I ordered the Try It Kit to see what it was all about.

Mount the stamp.
-peel away half of the backing
-press the label firmly onto the foam layer of the rubber stamp
Make it your own!

Each bookmark has 2 butterfly card stock stickers adhered back to back on the string.


At this point, I decided to subscribe to Paper Pumpkin and see what was in the Welcome Kit!
Welcome Kit

No matter! I came up with 4 more designs. The Baker's twine is from my Try It Kit, but you could use anything at hand.
My Designs

-the piercing can be done with a pin or left out
-after inking the splatter stamp, stamp on scrap paper, then on the mat to lighten the intensity

-cut 1 in. from the bottom of the mat and save it
-cut 2 X 3/8 in. strips from the side of the mat
-turn the strips over and adhere them under the sides of the mat

Design #2
-use 2 of the scallop stickers and trim them to fit on the mat
-cut the over-printed striped strip from the sticker sheet and adhere it over the scallop edge
-adhere the mat to the card front and stamp the sentiment
-tie a string bow in the button and adhere it to the card

Design #3
-cut the over-printed green strip from the sticker sheet and adhere it to the card front
-cut a leaf from a scallop sticker and adhere it to the card front
-cut 2 circles from the mat and adhere the larger circle, dot side up, to the card
-snip around the edge of the smaller circle, curl the petals upward, white side up and adhere it to the larger circle

-adhere it to the flower on the card front
-tie a string bow in a button and adhere it to the flower
-stamp the sentiment

-use a scrap from the flower card to cut a pennant
-ink "friend" on the sentiment and stamp it on the pennant
-fold the edge of the pennant over a length of string


-thread a button on the string

-adhere the banner of pennants to the white side of the mat
-adhere the ends of the string to the back
-adhere the mat to the card front
-stamp the sentiment (I used the Ink Spot from my Try It Kit)

Go ahead! Subscribe to Paper Pumpkin and make it your own. I'll be sharing My Paper Pumpkin here each month.