Friday, July 20, 2012

Dry Embossing Techniques: Template


The Big Shot makes dry embossing as easy as turning a handle, but you can still use a template to dry emboss a custom card on a light table.


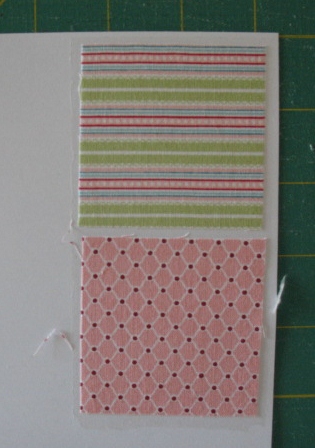
-adhere multi-purpose double sided adhesive sheet to card stock
-cut out letters with the Big Shot
-remove letters and save the outlines
-adhere the letters to your work surface with temporary adhesive


-adhere letter outlines with temporary adhesive to your work surface over letters trimming as necessary


-remove the letters from the work surface and discard them
-remove adhesive backing from letter outlines and adhere a square of window sheet over the letters


-this is the template


-score 3/8 in. from edge of square
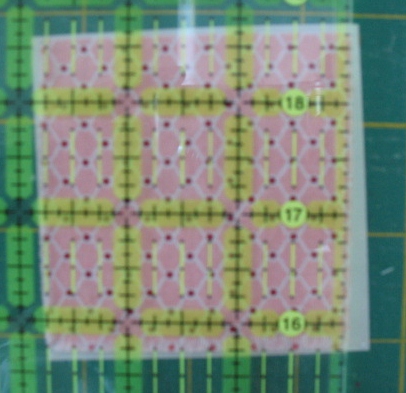
-turn over and score 1/8 in. inside scored square
-use diagonal plate to score frame corners


-adhere template to light table with temporary adhesive
-position scored card stock square over template
-cover with wax paper and use stylus to emboss letters

-score 4-1/4 in. X 11 in. card stock in half at 5-1/2 in.
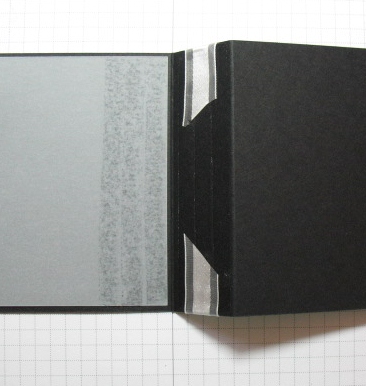
-score at 4-1/2 in. from bottom of card front
-adhere ends of ribbon above score line on card front
-adhere 4-1/8 in. X 5-3/8 in. sheet of vellum to inside back of card at the top
-adhere top section together forming a Hinge Card


-cut a small heart from Window Sheet with the Big Shot
-add Basic Rhinestones around the edge

-punch a hole in the window sheet and hang the heart on the ribbon with twine
-tie a ribbon bow over the ribbon strip
-adhere the embossed mat to the card front


Supplies
Paper
-Basic Black card stock 121045
-Whisper White card stock 100730
-Vellum card stock 101856
-Window Sheet 114323
Tools
-Big Shot 113439
-Typeset Alphabet Bigz dies 127553
-Hearts Framelits 125599
-Simply Scored tool 122334
-Diagonal Plate 125586
Accessories
-Multi-purpose adhesive sheets 120805
-Organza ribbon 114319
-Baker's twine 124262
-Basic Rhinestones 119246

Sunday, July 15, 2012

Dry Embossing Techniques: Dimension

The Stamp-a-ma-jig is essential for perfect placement when stamping two-step images like these beautiful flowers. Then cut them out and use a stylus with a foam mat to add dimension. Adhere them to the card front with Stampin' Dimensionals.

The embossed lattice background was made with the Simply Scored tool and the Diagonal plate.

Make the lovely doily with the Big Shot and Paper Doily Sizzlits die.


-stamp the background image with a light colour
-snug the transparent sheet into the corner of the Stamp-a-ma-jig
-ink the second image with a dark colour and use the corner of the Stamp-a-ma-jig as a guide to stamp on the transparent sheet
-Position the image on the transparent sheet over the light image
-snug the corner of the Stamp-a-ma-jig to the transparent sheet
-remove the transparent sheet and use the corner of the Stamp-a-ma-jig as a guide to stamp the darker image over the light image
-cut out the flower
-place the card stock flower on the foam mat and use the stylus to outline the petals and centre
-flip the flower over and use the rounded end of a pen or other similar tool to shape the flower on the foam mat
-place the card stock leaves on the foam mat and use the stylus to form the middle vein
-turn the leaf over and shape the back
-place the card stock rose on the mat and use the stylus to outline the petals
-turn the rose over and shape the petals


Supplies
Stamps
-Stippled Blossoms 126745
-Loving Thoughts 125843
Ink
-Pretty in Pink pad 126955
-Melon Mambo pad 126948
-Bashful Blue pad 126961
-Marina Mist pad 126962
-River Rock pad 126977
-Old Olive pad 126953
Paper
-Pink Pirouette card stock 111351
-Bashful Blue card stock 105120
-River Rock card stock 108640
-Whisper White card stock 100730
-So Saffron card stock 105118
Tools
-Stamp-a-ma-jig 101049
-Simply Scored Scoring Tool 122334
-Simply Scored Diagonal Plate 125586
-Stampin' Pierce Mat 126199
-Big Shot 113439
-Paper Doily Sizzlits die 125592
Accessories
-Stampin' Dimensionals 104430

Friday, July 13, 2012

Dry Embossing Techniques: Scored Frame


Add the perfect accent to simple one-layer cards with a scored frame. It always looks elegant and the Simply Scored Tool from Stampin' Up! makes it easy!


-snug the card front face down in the corner of the Simply Scored Tool and place the sylus 1/2 in. from the corner in a groove
-press and pull the stylus down to 1/2 in. from the bottom corner
-repeat on the other side


-turn the card front and join the ends of the first lines with the sylus


Supplies
Stamps
-Field Flowers set 122760
Ink
-Basic Black pad 126980
-Crumb Cake pad 126975
-Crumb Cake marker 120967
Paper
-Naturals Ivory card stock 101849
Tools
-Stamp-a-ma-jig
-Stampin' Pierce mat 126199
-Paper-Piercing tool 126189
-Essentials Paper-Piercing pack 126187
-Simply Scored Scoring tool 122334

Here's a variation with a mat placed inside the scored frame.


Sunday, July 8, 2012

Dry Embossing Techniques: Faux Embossing

For a quick alternative to dry embossing with a stylus, just add a punched or die cut shape in the same colour as the background!

Supplies
Stamps
-Apothecary Art 125525
Ink
-Always Artichoke pad 126972
-River Rock marker
-Pink Pirouette marker
-Pretty in Pink marker
Paper
-River Rock card stock 108640
-Very Vanilla card stock 101650
Tools
-Big Shot 113439
-Labels Collection Framelits 125598
-Perfect Polka Dots embossing folder 117335
Accessories
-Basic Pearls 119247
-Stampin' Dimensionals 104430

Sunday, July 1, 2012

Dry Embossing Techniques: Faux Quilt

The pieced fabric pinwheel was embossed using the Big Shot and the Square Lattice die to give the appearance of quilting.

Instructions for the Twitterpated fabric yoyo can be found here.


-cut a 3-3/4 in. X 5-1/2 in. piece of Sizzix Multi-purpose adhesive sheet and adhere it to copy paper
-cut a 2-1/2 in. square from 2 of the Twitterpated fabric prints and adhere them to the adhesive on the copy paper
-trim and square the sides of the paper mounted fabric squares
I like to use my quilting ruler and rotary cutter for this!
-cut both squares across the diagonals; you'll have 4 triangles of each fabric.
-adhere a 4 in. square piece of Multi-purpose adhesive to a 4 in. square piece of card stock
-adhere the fabric triangles to the card stock forming a pinwheel design
-trim and square the sides of the card stock
-use the Big Shot and the Square Lattice embossing folder to emboss the fabric and card stock


Supplies
Stamps
-Sweet Essentials 126455
Ink
-Island Indigo pad 126896
Paper
-Whisper White card stock 100730
-Pretty in Pink card stock 100459
-Certainly Celery card stock 105125
-White copy paper
Tools
-Big Shot 113439
-Square Lattice embossing folder 119976
-Paper-Piercing Tool 126189
-Stampin' Pierce Mat 126199
-Essentials Paper-Piercing Pack 126187
Accessories
-Twitterpated Designer fabric 125412
-Multi-purpose Adhesive sheets 120805
-Subtles buttons 119745
-Island Indigo Baker's twine 125575