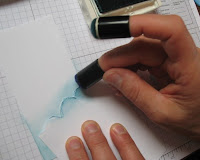
I used a torn piece of card stock and sponged ink over the edge onto the mat to give the impression of clouds in the sky for this card.
The grass was stamped over the clouds and on the card front in matching ink.
Sponge some colour on the bottom of the mat.
I used 2 colours of blue ink with sponge daubers over the edge of the mask.
Keep moving the mask upward and adding more ink.
Supplies
Stamps
-Inspired By Nature 111656
-You're a Gem 122268
Ink
-Baja Breeze pad 111833
-Bashful Blue pad 105209
-More Mustard pad 103162
-Old Olive marker 100079
-Soft Suede marker 120973
Paper
-Whisper White card stock
-More Mustard card stock
-So Saffron card stock
-Baja Breeze card stock
-Confetti Cream card stock 102835
Tools
-Sponge Daubers 102892
-1 in. Square punch 124094
-Postage Stamp punch 122344
Accessories
-Linen thread 104199
-Mini Library Clip 109857
-Stampin' Dimensionals 104430
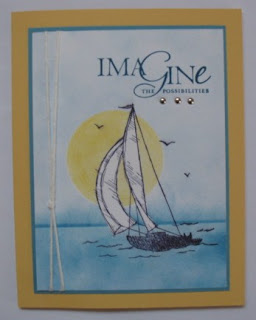
 Masking Scenery
When planning to stamp a scene, remember to stamp the front image first and cover any part of it with a mask to keep it unchanged.
This scene required a number of masks and a little planning.
Stamp the sailboat on the mat and on scrap paper. Use StazOn ink to avoid smearing the image. Cut out the sails stamped on scrap paper and use repositionable adhesive to cover the sails on the mat so that they stay white.
Punch a circle for the sun in scrap paper and place it over the sails. Use a sponge dauber to colour the sun, then remove the mask.
Cover the sun with the circle punched from the scrap paper and use repositionable adhesive so that it doesn't move.
Cover the waterline with the edge of a sheet of scrap paper and use sponge daubers to colour the sky. You could try using the cloud technique shown above.
Cover the sky with the edge of a sheet of scrap paper and use sponge daubers to colour the water.
Cover the water and colour the horizon using sponge daubers.
Remove all the mats.
Supplies
Stamps
-Sail Away 123013
-Word Play 120308
Ink
-Daffodil Delight pad 119667
-Bashful Blue pad 105209
-Baja Breeze pad 111833
-Not Quite Navy pad 103008
-Black StazOn pad 101406
Paper
-Whisper White card stock
-Marina Mist card stock
-So Saffron card stock
Tools
-Sponge Daubers 102892
-1 3/4 in. circle punch 119850
-Mat Pack 105826
-Piercing Tool 116631
Accessories
-White Baker's Twine 124262
-Silver Mini brads 122941
-Dotto repositionalble adhesive 103305


