
I used the Twitterpated fabric from the Occasions Mini Catalogue and a natural cotton for the face. All the pieces for the head are cut using Stampin' Up! dies and the Big Shot.
If you use it for a baby shower don't use brads for the eyes and nose. Just sew some embroidery instead. And, make sure to tie a knot in the ribbon around the neck before making the bow.
Directions

Fold it in quarters and mark the centre with a pin.

Back-stitch at both ends to secure the stitching.


Layer the green striped fabric and the pink print fabric with right sides together and trace the cardboard oval on the fabric twice.
I used a disappearing ink pen, but a pencil will work.

Sew around the shapes, back-stitching at the beginning and end.
Trim close to the stitching with pinking shears.
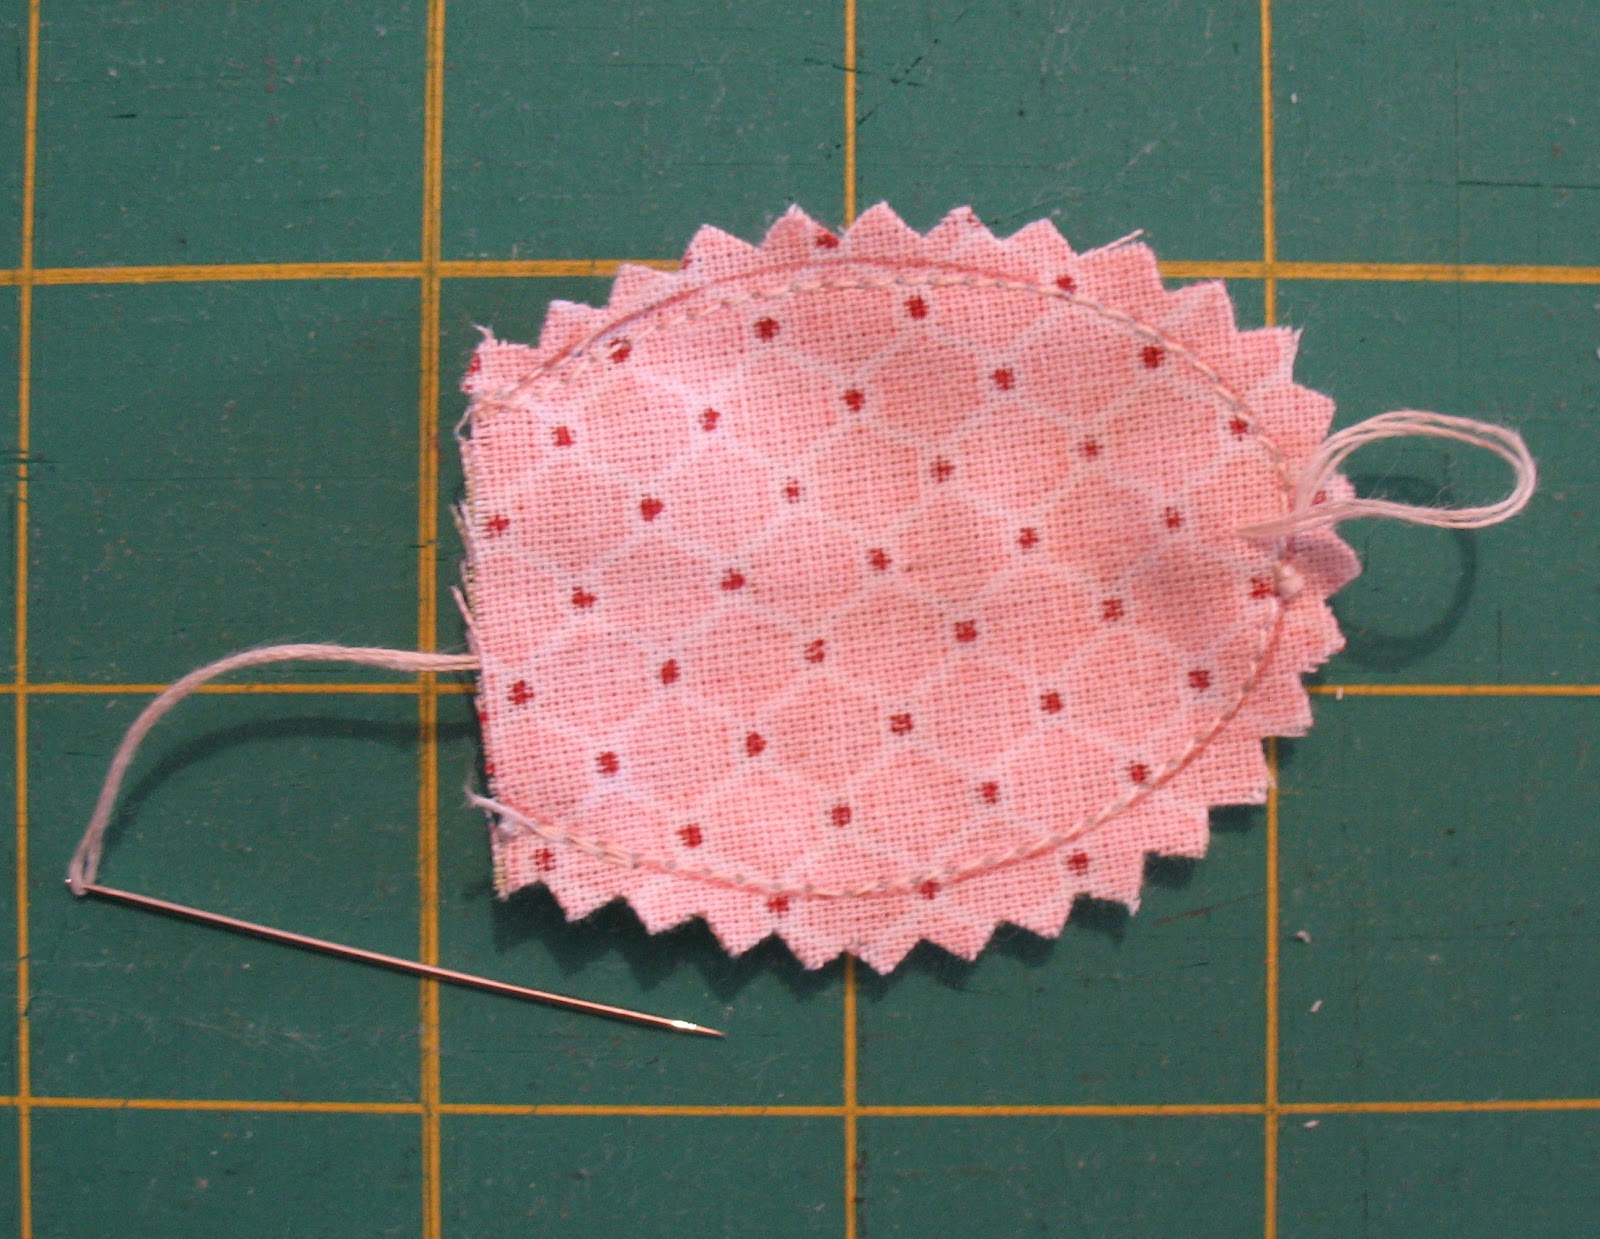
I thread a needle with doubled thread for strength and take a small stitch next to the stitching. Then, pierce the top layer of fabric and bring the needle out the opening.


Fold it in half and mark both edges with pins.


Trim with pinking shears and turn right side out.

Fold the face in half along the seam and insert a pin through both layers for eye placement. Secure blue brads.
Secure a pink brad at the top of the face seam for the nose.

Cut an 8 in. circle of the floral print fabric.
Fold over 1/4 in. and sew with running stitches around the edge. I used doubled thread for strength and secured the beginning with a few small stitches sewn over each other.

Secure the folds with stitches before cutting the thread. It helps to squeeze the ball and release the tension.


Fold in half lengthwise and sew a 1/4 in. seam.
Turn the tube and tie a knot in the middle.

Tie ribbon around the neck to hide the stitches.
Supplies
Natural cotton fabric
Twitterpated fabric 125412
Big Shot 113439
Ovals die 114525
Circles die 114526
Scallop Circles die 113469
Subtles brads 119745
1 comment:
What a stinkin' cute bunny!!! Thank you so much for the picture tutorial!!
I will be featuring this bunny on My Crafty Picks #60 with a link back to your blog on 4-8-12. Make sure to stop by to check out all the picks and to pick up your blog badge to display on your blog for being featured!!
If you wish to decline please email me by responding to this comment to let me know.
Have a blessed Easter
Tiffany Bauer
http://www.mycraftyworld.blogspot.com
Post a Comment