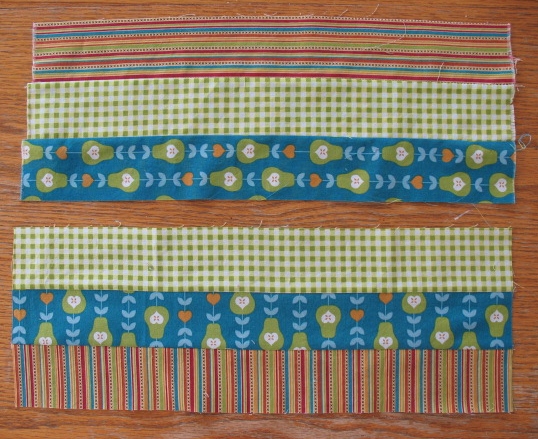
I usually have to agonize over choosing what to do with the latest fabrics from Stampin' Up!, but this time it was obvious. A tea cozy with pinwheels! How great that I had enough fabric for a hot mat and 2 napkins! After that the rest was easy. I used the Designer Series Paper to make labels for my jars of herbal teas, placed paper doilies under the cups in the saucers, and finally, I hung the Tea Time Trinket Charms from the chains on some tea balls. Tea for Two!
 -use the Labels Collection Framelits (125598) to cut out the Tea for Two DSP (129311) and sponge the edges with Early Espresso ink (126974)
-use the Scallop Oval punch (119856) to cut out Early Espresso card stock (119686)
-use the Large Oval punch (119855) to cut out printed Very Vanilla card stock (101650)
-layer them and stick them to the jar

I love these charms! They're perfect on the ends of the tea infuser chains.


Hot Mat
My quilted hot mat is 12 inches square.
Wash and dry the Tea For Two package of three fat quarters (129308). You will also need batting and cotton lining fabric.
Press and square the edges.
All seam allowances are a scant 1/4 in. unless otherwise noted.

Pinwheel Print
-for the Hot Mat you will use the 2-1/2 in. strips
-set aside the other pieces for the Tea Cozy

Calypso Coral Print
-for the Hot Mat you will used most of the 2-1/2 in. strips and all of the 2-7/8 in. strips
-set aside the square for the napkin

Baja Breeze Print
-for the Hot Mat you will used most of the 2-1/2 in. strips and all of the 2-7/8 in. strips
-set aside the square for the napkin

-cut the 2-7/8 in. Calypso Coral strips into 8 squares
-cut the 2.7/8 in. Baja Breeze strips into 8 squares
-place a Baja Breeze square on a Calypso Coral square with right sides together
-mark diagonally with a disappearing marker or pencil
-sew a scant 1/4 in. on both sides of the line
-cut on the line and press the square open
-trim off the little triangles/dog ears

-sew 2 squares together
-press seam toward Calypso Coral
 -sew sections into blocks
-sew blocks together
-notice the direction of the seams on the back

-sew the short Pinwheel Print strips to the sides of the block
-press seams toward Pinwheel Print

-sew the long Pinwheel Print strips to the sides
-press the seams toward the Pinwheel Print

-press twelve 2-1/2 in. Baja Breeze Print squares on the diagonal
-press again on the diagonal
-press twelve 2-1/2 in. Calypso Coral Print squares on the diagonal
-press again on the diagonal
 -pin six triangles to each side of the pieced block overlapping the corners
-baste a scant 1/4 in. from the edge

-cut a piece of batting 11-3/4 X 11-3/4
-position the batting on the wrong side of the block

-cut a piece of cotton lining fabric 12-1/2 X 12-1/2
-position the lining on the right side of the block
-sew a scant 1/4 in. from the edge, leaving an opening for turning

-trim corners
-press lining seam allowances toward centre
-turn right side out and press
 -hand stitch opening closed

-quilt on right side as shown on the wrong side
 Tea Cozy
Use the remaining fabric pieces to make this Tea Cozy.
You will also need batting and cotton lining fabric.
 -cut two 7 X 13 lining pieces
-sew the 1 X 13 strip of Pinwheel Print to one side of the lining
-sew the 9 X 13 piece of Pinwheel Print to the other side of the lining
-press the seams toward the print

-measure and mark 1/2 in. from seams on sides
-snip 5/8 in. at markings

-sew 5/8 in. seam across bottom to join sections
-press seam open

-turn right side out

-to hem the slit in the middle, fold one section back over the other section
 -sew 5/8 in. seam between snips keeping the inside section free
-trim seam to 1/4 in.

-turn right side out and press

-repeat the steps on the unfinished edge

-turn right side out and press

-with right sides together, sew a 5/8 in. seam between the snips on the ends of both sections
-turn right side out and press

-sew a 5/8 in. seam to join top tabs in the middle

-turn right side out and press
 -hem the tabs at the sides by folding over twice and stitching close to the fold

-sew a row of stitching on the seam on the bottom
-sew another row of stitching 1/2 in. away to form casing for elastic

-turn section inside out and pin 6 X 11-1/2 piece of batting to wrong side of Pinwheel Print

-turn right side out
-the top edge of the batting should be 1/2 in. below the seam

-pin remaining fabric triangles from Hot Mat to the top raw edge of the Pinwheel Print
-sew a scant 1/4 in. from the edge
-press the seam toward the Pinwheel Print

-press 1/4 in. of the facing strip to the inside

-hand stitch the hemmed sides together, leaving a slit for the ribbon

-hand stitch to folded edge of the facing to the seam with the fabric triangles

-sew a row of stitching along the seam of the facing and the lining
-sew another row of stitching 1/2 in. away to form casing for ribbon
-the quilting was sew on the right side following the pattern of the Pinwheel Print

-cut a piece of 1/4 in. elastic the same 1 in. less than the measurement of the base of your teapot
-insert the elastic into the bottom casing
-pin the ends of the elastic even with the edges of the fabric
-sew a 5/8 in. seam through all layers
-trim the seam to 1/4 in. and press open
-secure with zigzag stitching

-thread 30 in. of 1/4 in. wide ribbon through top casing
-to dress your teapot, insert the spout through the slit in the middle of the Tea Cozy and tie the ribbon in a bow above the handle, while gathering the casing.
Napkins

-layer the fabric reserved for the napkins
-trim to 14 X 14 in.
-fold over 1/4 in. on edges and press
-fold over 1/4 in. again and press
-stitch close to the fold to hem
 |

-use the Scallop Oval punch (119856) to cut out Early Espresso card stock (119686)
-use the Large Oval punch (119855) to cut out printed Very Vanilla card stock (101650)
-layer them and stick them to the jar

I love these charms! They're perfect on the ends of the tea infuser chains.


Hot Mat
My quilted hot mat is 12 inches square.
Wash and dry the Tea For Two package of three fat quarters (129308). You will also need batting and cotton lining fabric.
Press and square the edges.
All seam allowances are a scant 1/4 in. unless otherwise noted.

Pinwheel Print
-for the Hot Mat you will use the 2-1/2 in. strips
-set aside the other pieces for the Tea Cozy

Calypso Coral Print
-for the Hot Mat you will used most of the 2-1/2 in. strips and all of the 2-7/8 in. strips
-set aside the square for the napkin

Baja Breeze Print
-for the Hot Mat you will used most of the 2-1/2 in. strips and all of the 2-7/8 in. strips
-set aside the square for the napkin
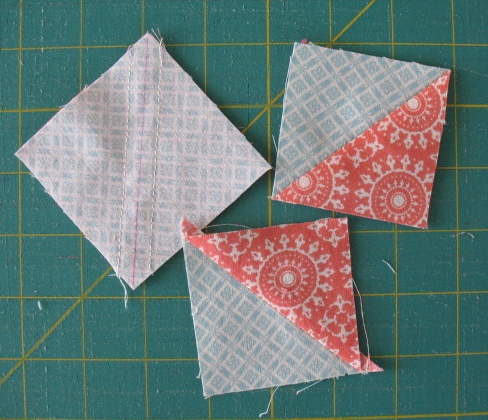
-cut the 2-7/8 in. Calypso Coral strips into 8 squares
-cut the 2.7/8 in. Baja Breeze strips into 8 squares
-place a Baja Breeze square on a Calypso Coral square with right sides together
-mark diagonally with a disappearing marker or pencil
-sew a scant 1/4 in. on both sides of the line
-cut on the line and press the square open
-trim off the little triangles/dog ears

-sew 2 squares together
-press seam toward Calypso Coral

-sew blocks together
-notice the direction of the seams on the back

-sew the short Pinwheel Print strips to the sides of the block
-press seams toward Pinwheel Print

-sew the long Pinwheel Print strips to the sides
-press the seams toward the Pinwheel Print

-press twelve 2-1/2 in. Baja Breeze Print squares on the diagonal
-press again on the diagonal
-press twelve 2-1/2 in. Calypso Coral Print squares on the diagonal
-press again on the diagonal
 -pin six triangles to each side of the pieced block overlapping the corners
-baste a scant 1/4 in. from the edge

-cut a piece of batting 11-3/4 X 11-3/4
-position the batting on the wrong side of the block

-cut a piece of cotton lining fabric 12-1/2 X 12-1/2
-position the lining on the right side of the block
-sew a scant 1/4 in. from the edge, leaving an opening for turning

-trim corners
-press lining seam allowances toward centre
-turn right side out and press


-quilt on right side as shown on the wrong side

Use the remaining fabric pieces to make this Tea Cozy.
You will also need batting and cotton lining fabric.

-sew the 1 X 13 strip of Pinwheel Print to one side of the lining
-sew the 9 X 13 piece of Pinwheel Print to the other side of the lining
-press the seams toward the print

-measure and mark 1/2 in. from seams on sides
-snip 5/8 in. at markings

-sew 5/8 in. seam across bottom to join sections
-press seam open

-turn right side out

-to hem the slit in the middle, fold one section back over the other section
 -sew 5/8 in. seam between snips keeping the inside section free
-trim seam to 1/4 in.

-turn right side out and press

-repeat the steps on the unfinished edge

-turn right side out and press

-with right sides together, sew a 5/8 in. seam between the snips on the ends of both sections
-turn right side out and press

-sew a 5/8 in. seam to join top tabs in the middle

-turn right side out and press


-sew a row of stitching on the seam on the bottom
-sew another row of stitching 1/2 in. away to form casing for elastic

-turn section inside out and pin 6 X 11-1/2 piece of batting to wrong side of Pinwheel Print

-turn right side out
-the top edge of the batting should be 1/2 in. below the seam

-pin remaining fabric triangles from Hot Mat to the top raw edge of the Pinwheel Print
-sew a scant 1/4 in. from the edge
-press the seam toward the Pinwheel Print

-press 1/4 in. of the facing strip to the inside

-hand stitch the hemmed sides together, leaving a slit for the ribbon

-hand stitch to folded edge of the facing to the seam with the fabric triangles

-sew a row of stitching along the seam of the facing and the lining
-sew another row of stitching 1/2 in. away to form casing for ribbon
-the quilting was sew on the right side following the pattern of the Pinwheel Print

-cut a piece of 1/4 in. elastic the same 1 in. less than the measurement of the base of your teapot
-insert the elastic into the bottom casing
-pin the ends of the elastic even with the edges of the fabric
-sew a 5/8 in. seam through all layers
-trim the seam to 1/4 in. and press open
-secure with zigzag stitching

-thread 30 in. of 1/4 in. wide ribbon through top casing
-to dress your teapot, insert the spout through the slit in the middle of the Tea Cozy and tie the ribbon in a bow above the handle, while gathering the casing.
Napkins

-layer the fabric reserved for the napkins
-trim to 14 X 14 in.
-fold over 1/4 in. on edges and press
-fold over 1/4 in. again and press
-stitch close to the fold to hem